You can now define a scaling schedule on Laravel Cloud and let it handle the rest. Set your autoscaling limits once for each traffic window, whether that’s peak hours, business hours, batch jobs, or weekend lows, and your infrastructure adjusts automatically, on time, every time.
Scheduled autoscaling means you stop paying for compute you don't need just to feel safe during a window you could have predicted. It also saves you from manually adjusting bounds before each campaign or busy period.
Alongside scheduled autoscaling, now available in Cloud’s Business and Enterprise plans, we’ve also recently released a set of quality-of-life improvements, including new SSO options for Google and GitHub that allow you to sign in with a single step, and updates to your usage page to get detailed information on exactly what is driving your Cloud bill.
Together, these updates make Laravel Cloud faster to get into, easier to operate, and less expensive to run.
What Is Scheduled Autoscaling?
Reactive autoscaling waits for a traffic signal before scaling up. For most unexpected spikes, that is fine. But if you already know when demand is coming, scheduled autoscaling gives you proactive control.
You can now define scheduled autoscaling rules in Laravel Cloud that set the minimum and maximum scaling bounds for your app compute and worker clusters on a per-environment basis. Before your peak window opens, your infrastructure is already in place. When it closes, it automatically scales back down, helping you save on compute costs.
For queue workloads, managed queues handle this automatically. Workers scale based on the number of jobs waiting and drop to zero when the queues are empty, so no scheduled rules are needed.
Reactive autoscaling continues to operate normally within whatever bounds you set, now with the ability to proactively scale when you know you will need it.
How to Set Up a Scheduled Autoscaling Rule
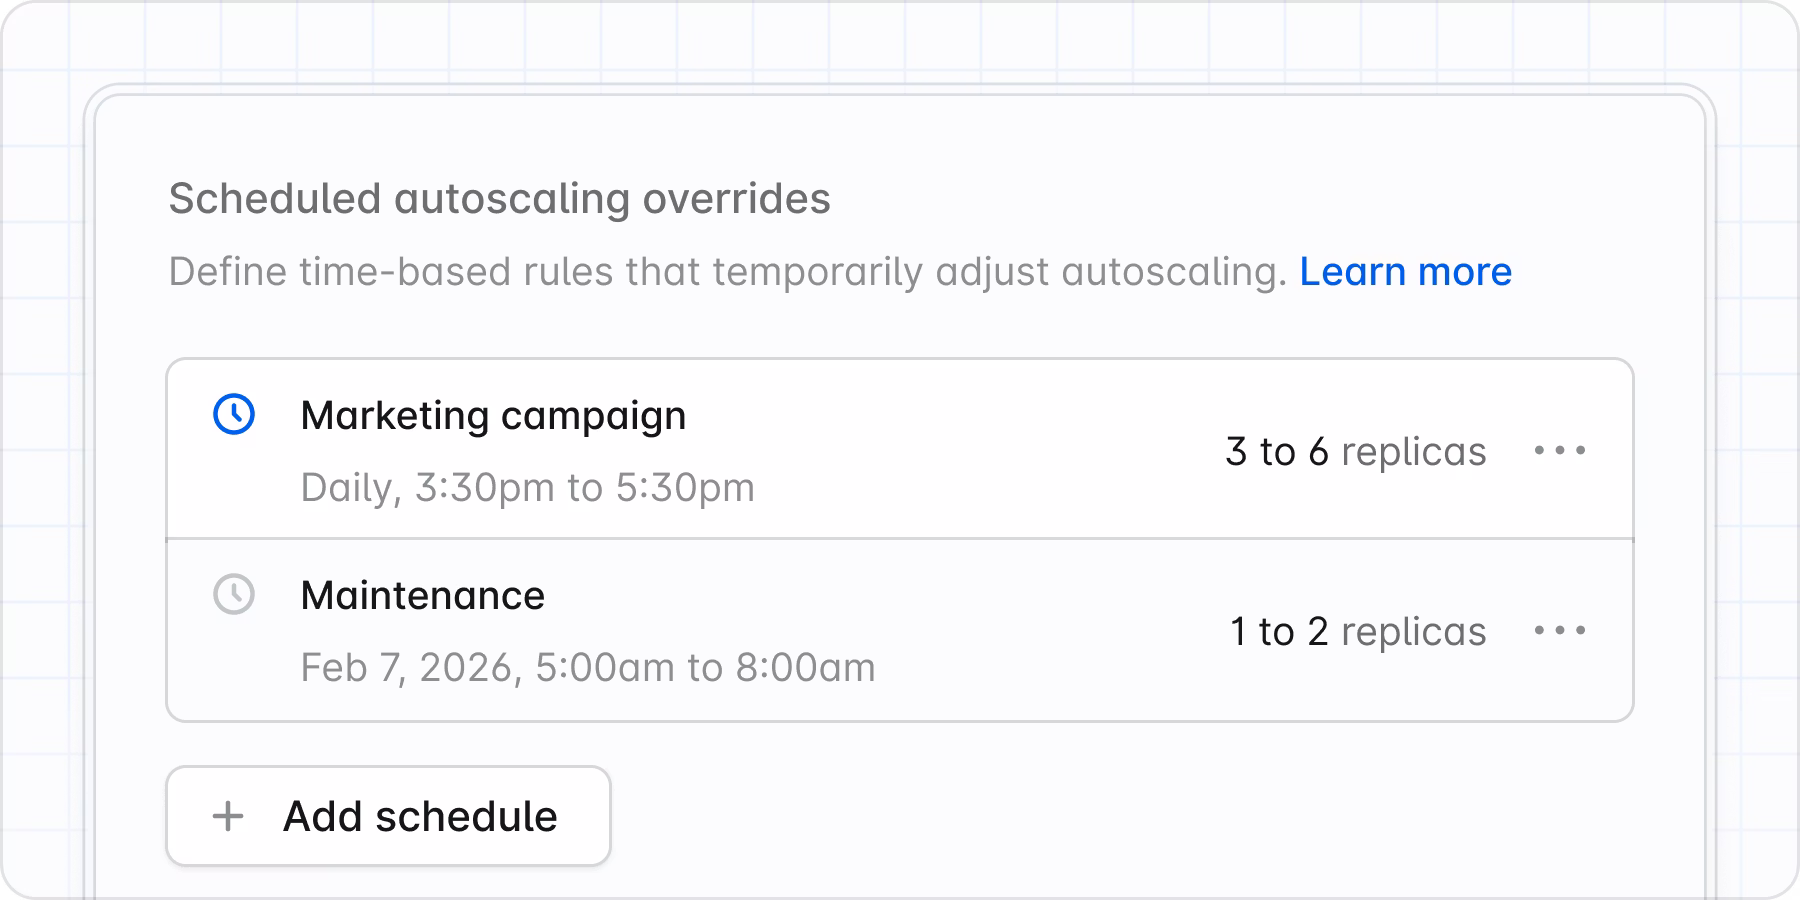
In your environment settings, create a rule that defines the following details:
- Which days of the week it applies
- The time window it should be active
- The minimum and maximum autoscaling bounds for that window
Outside of your scheduled window, your defaults take over. When a schedule takes effect or reverts, it appears in your activity log. Your dashboard shows your currently active bounds and when the next scheduled change is coming, so your scaling state is always visible.
Read the scheduled autoscaling docs for more information.
Who Is Scheduled Autoscaling For?
Here are some of the use cases where scheduled autoscaling in Laravel Cloud is most helpful:
- You’re running an e-commerce store with predictable peak shopping hours.
- You’re building SaaS products that only see traffic during business hours.
- You’re running batch jobs or data pipelines on a recurring schedule.
- You’re currently overprovisioning to stay safe during known busy periods.
- You’re manually adjusting scaling settings before campaigns, product launches, or sales events.
If you have ever bumped your minimum instance count the night before a sale and forgotten to bring it back down, this removes that entirely. While most platforms offer reactive autoscaling, they do not support time-based scheduling with min-max bound control. For teams with predictable, repeating traffic patterns, this is a meaningful operational upgrade and help you save compute costs.
Sign In Faster with Google SSO and GitHub SSO
Laravel Cloud’s scheduled autoscaling is only one of the quality-of-life improvements we’ve been working on. Today’s releases enable developers building on Cloud not only to scale smarter, but to sign in faster and better understand their resource usage. The goal is to deliver a better overall Cloud experience from start to finish.
Sign In with Google SSO
Users on all plans can now sign in to Laravel Cloud with their Google account. If your team is on Google Workspace, there is no separate Cloud password to manage.
As part of this change, destructive actions now use typed resource-name confirmation instead of password prompts, and disabling two-factor authentication now requires a 2FA challenge rather than a password. Both are stronger, safer flows.
Sign Up with GitHub SSO and Go Straight to Your Repo
Previously, getting a new developer from Laravel Cloud sign-up to first deploy required two separate authentication steps: creating a Cloud account, then connecting a GitHub account for source control. GitHub SSO collapses that into one.
When you sign up with GitHub, the OAuth token from that login is treated as your source control connection. You go straight from account creation to picking your repository.
For existing users, there is nothing to do. If your Cloud account email matches your GitHub email, your account will link automatically the next time you sign in via GitHub.
Get Clearer Visibility into Your Cloud Spend
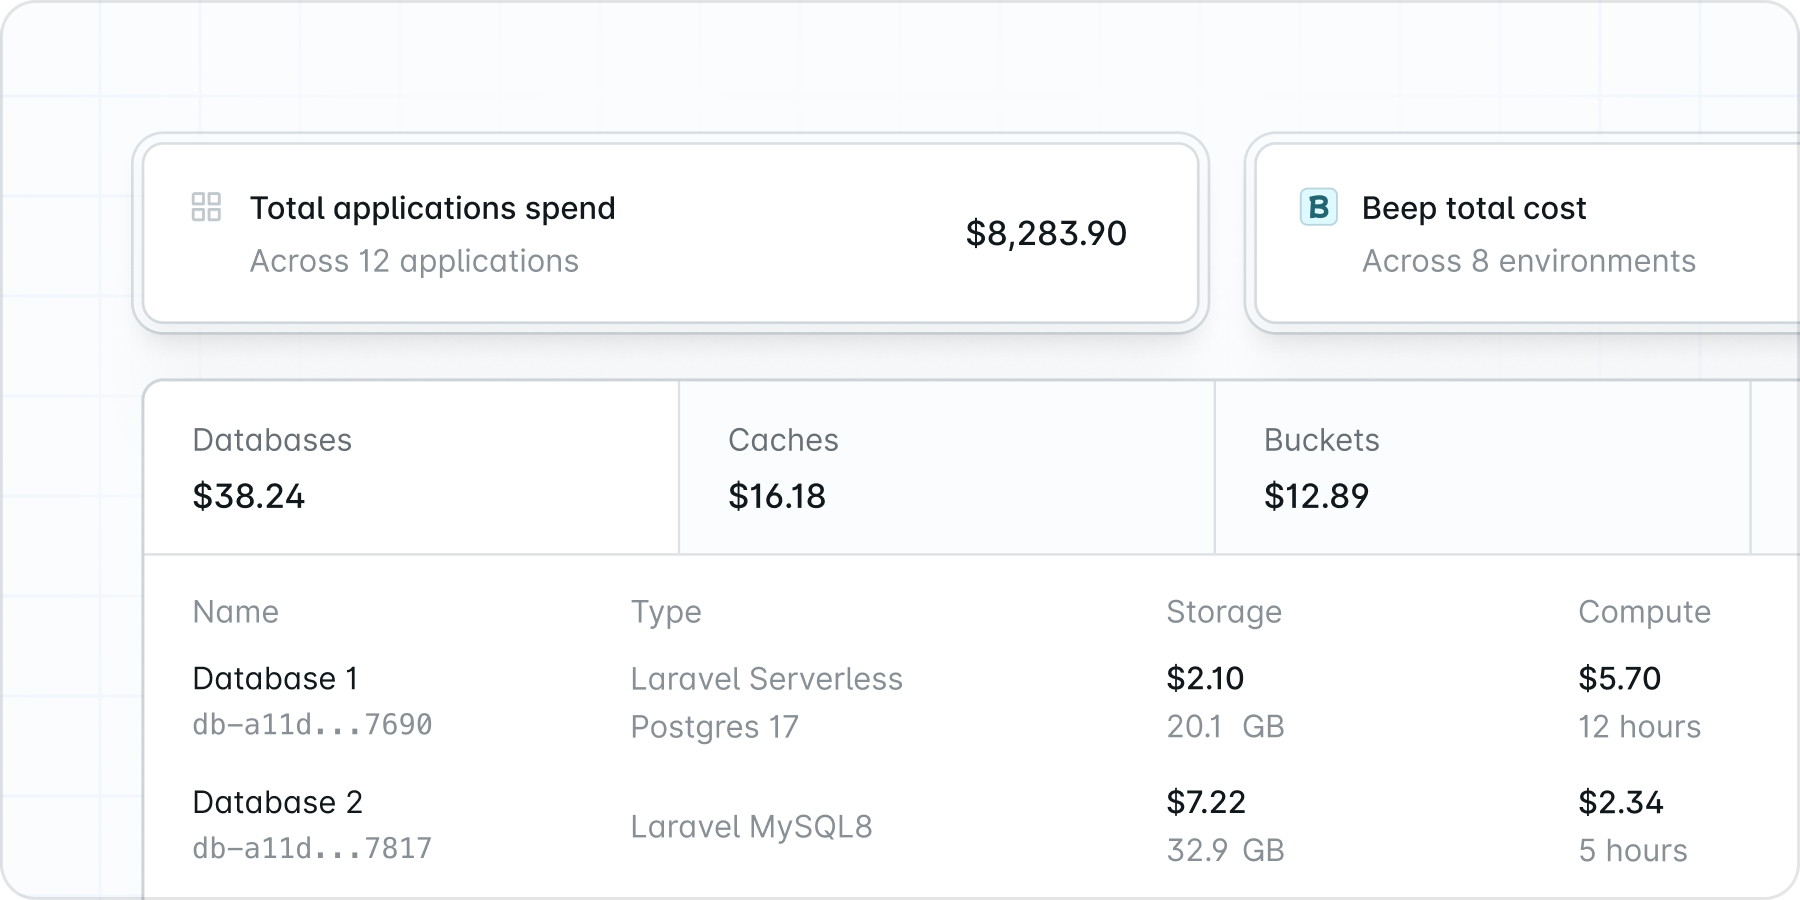 You can now drill down from your organization-level spend all the way to individual resource costs, with visual breakdowns of how usage changes over time. The redesigned usage page gives every customer a clearer picture of what is driving their bill.
For Enterprise customers on Laravel's Private Cloud, this release adds transparent AWS cost passthrough. Data Transfer, VPC, ELB, NAT Gateway, and CDN costs now appear as line items on your bill rather than being abstracted into a flat number. If your finance or ops team needs to audit infrastructure costs or report them back to procurement, this gives you the data to do that.
See the updated usage page →
A Better Cloud Experience from Start to Finish
Scheduled autoscaling, Google SSO, GitHub SSO, and the new usage page are all live today.
To get started with scheduled autoscaling, go to your environment settings, open the autoscaling section, and add your first time-based rule. If you have a traffic pattern you can predict, you can have a schedule configured in a few minutes. See how compute and autoscaling work in Cloud.
If you don’t have a Laravel Cloud yet, sign up quickly, set time-based autoscaling rules, and know that you will have full visibility into your spend and cost savings at the end of each month.